Hi there—I’m Henry Chen, CEO of Jinan Cassman Machinery. For over a decade, I’ve been elbow-deep in the gritty, exciting work of turning craft brewers’ dreams into real, working breweries. I’ve stood on factory floors troubleshooting welds, knelt in brewhouses adjusting mash temps, and stayed late at commissioning sites to make sure a new system pours its first clean pint.
We build brewing gear right here in Jinan, China, and ship it to brewers worldwide—from tiny pilot systems for test batches to full turnkey microbrewery lines that crank out consistent IPAs, lagers, or sours day in and day out. If you’re planning your first brewery (congrats!) or upgrading an existing setup (we’ve all been there with “this old tank just isn’t cutting it”), I want to share what I’ve learned. No jargon, no fluff—just the equipment that actually matters, the mistakes I see brewers make again and again, and how we build systems to help you brew clean, reliable beer from day one.
What a Microbrewery Really Needs (The Essentials, Not the Hype)
Let’s cut to the chase: every microbrewery needs core hardware, but the names can get confusing depending on who you talk to. Here’s the breakdown of what you can’t skip—based on years of building systems for brewers like you.
1. Brewhouse (Mashing & Wort Production: The “Hot Side”)
This is where the magic starts—turning grain into wort. Skimp here, and you’ll fight consistency forever.
Grain mill: A consistent crush is non-negotiable. Too fine, and you’ll clog the lauter (trust me, nothing kills a brew day faster than a stuck mash). Too coarse, and you’ll miss your gravity targets (wasting grain = wasting money).
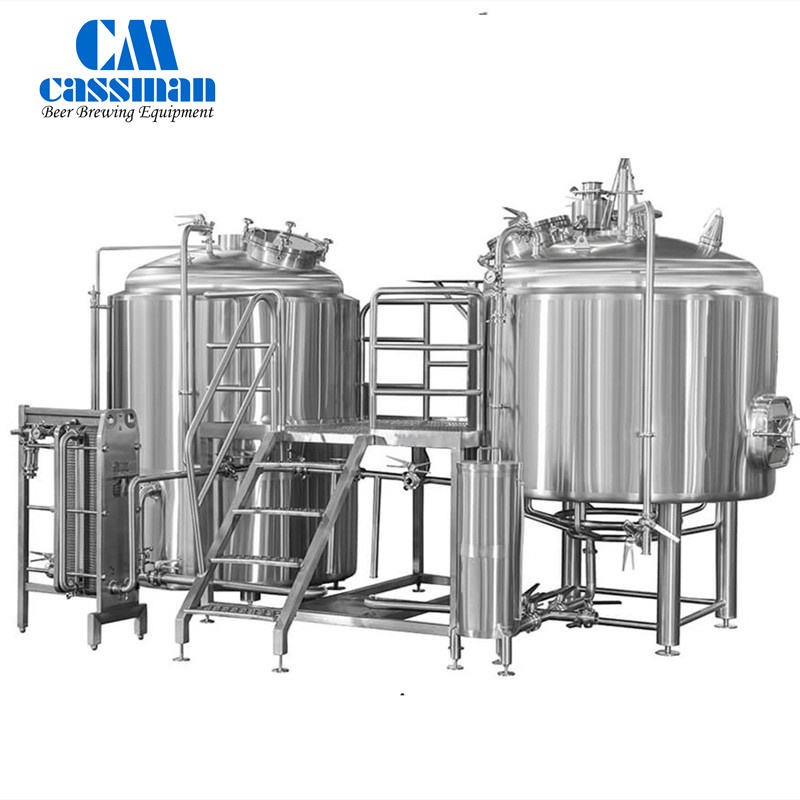
Mash/lauter tun: For most startups, a 2-vessel setup (mash/lauter + kettle/whirlpool) is simple and budget-friendly. If you’re brewing 2+ batches a day, step up to 3 or 4 vessels—they let you run parallel steps (like lautering one batch while boiling another) to save time. Look for a well-designed false bottom, easy-to-use rakes, and a variable-speed (VFD) wort pump—small upgrades that make your team’s life way easier.
Kettle/whirlpool: Steam heating is my go-to—it’s the most even and controllable, perfect for hitting boil times and hop additions. Electric or direct fire work too, but check your local utilities first (e.g., direct fire needs good ventilation, electric needs enough power).
Heat exchanger: A plate exchanger with city water + a glycol loop is standard. Size it for your climate—if you’re in a hot area, you’ll need more cooling power to hit your knockout temp (that’s the temp you chill wort to before fermentation).
Pumps & valves: Sanitary, easy to take apart for cleaning, and sized for your pipes. Don’t cheap out here—leaky valves or finicky pumps will ruin your brew day.

2. Fermentation & Conditioning (The “Cold Side”)
This is where wort becomes beer—so hygiene and temperature control are everything.
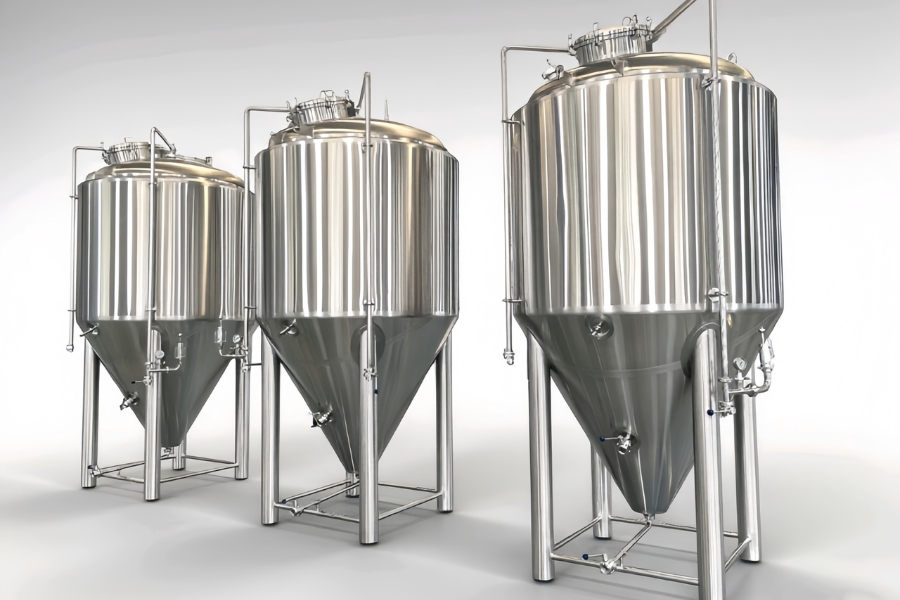
Fermentation tanks (FV): Stainless steel 304 is the standard (it’s durable and easy to clean). If you’re brewing sours, acids, or beers with high chloride levels, step up to SS316L—it resists corrosion better. Look for:
Internal polishing (aim for Ra ≤ 0.6 μm—super smooth, so bacteria can’t hide)
Full CIP (clean-in-place) spray coverage (no more hand-scrubbing tanks!)
Thermal jackets (to hook up glycol and control temp)
Brite tanks: For carbonation and clarifying beer before serving or packaging. If you’re pouring directly from the tank to taps, make sure it has the right fittings and a sight glass (so you can see how much beer is left). Glycol jackets and accurate carb stones are worth the extra cost—they let you dial in carbonation perfectly.
3. Cooling & Glycol (Don’t Undersize This—Please!)
I’ve seen so many brewers skip out on a properly sized glycol system, only to panic when summer hits. Here’s what you need:
Glycol chiller: Size it for your worst-case scenario—think: chilling a batch of wort while cooling 2-3 fermentation tanks and cold-crashing another. Undersize it, and you’ll struggle to hit fermentation temps (leading to off-flavors).
Glycol loop: Use the right pipe size, insulate it well (no condensation = no mold), and add a buffer tank. Small details, but they prevent big headaches later.
Controls: Basic digital controllers work for small setups. If you want to save time, an automated PLC with a touchscreen lets you set multiple temp targets, get alarms (e.g., “glycol temp too high!”), and log data—great for consistency.
4. CIP & Sanitation (Hygiene = Good Beer)
Contamination is the #1 enemy of craft beer. A good CIP system saves hours and keeps your beer clean.
CIP system: A dedicated cart or skid with tanks for caustic, acid, and hot water. It circulates cleaning solutions through your tanks and lines—no more climbing ladders to scrub!
Hygienic design: This is where most breweries drop the ball. Look for:
Full-penetration welds (no gaps for bacteria to hide)
No “dead legs” (those short, unused pipe stubs that trap old wort)
Proper drains (sloped floors, trench drains with baskets)
Drainage: Trust me, you’ll thank yourself for investing in good drains. Spilled wort, cleaning water, and steam need to go somewhere—puddles lead to mold and slips.
5. Packaging & Draft (Get Your Beer to Drinkers)
How you package depends on your plan—taproom-only vs. distribution.
Kegging: You’ll need a keg washer (manual is fine for small batches), a CO₂ supply with regulators, and kegs (Sanke or Cornelius—check what’s common in your market).
Canning/bottling: If you want to sell outside your taproom, plan a small canning line early—even a manual one. Leave space to upgrade later (you’ll grow faster than you think!).
Gas management: CO₂ lines, pressure relief valves (PRVs), and regular safety checks. Don’t skip safety here—CO₂ is dangerous if not handled right.
6. Material Handling & Utilities (The “Behind-the-Scenes” Stuff)
These are the things no one talks about until they’re missing.
Gantry/hoist: For larger systems, a slow-lifting hoist (around 4 seconds per foot) makes moving spent grain safe. Hauling heavy bags of grain by hand gets old fast.
Hot/cold liquor tanks (HLT/CLT): Match their size to your brew length. If you want to double-batch (brew two batches back-to-back), your HLT needs enough hot water to cover both.
Steam boiler/electric power: Check local codes before you buy. Nothing kills a project faster than realizing your building can’t handle the electrical load or steam venting.
7. Instruments & Lab Basics (Stay on Target)
You don’t need a fancy lab, but these simple tools will keep your beer consistent:
Hydrometer or refractometer (to measure gravity)
pH meter (critical for mashing and sour beers)
Thermometers (digital is better—analog can be off)
Scales (for measuring grain and hops—accuracy matters!)
Optional filtration: A filter pump and housing help with clarity, but only if you need it (e.g., for lagers). Hazy IPAs don’t need filtration—save the money!

How to Choose the Right Brewhouse (The Big Decision)
Your brewhouse is the heart of your brewery—choose wisely. Here’s how to narrow it down, based on what I’ve seen work for hundreds of brewers.
Brewhouse Configuration: 2, 3, or 4 Vessels?
2-vessel (MLT + kettle/whirlpool): Perfect for startups. Lower upfront cost, easy to learn, and works for 1-2 brews a day. Most new breweries start here—and it’s more than enough.
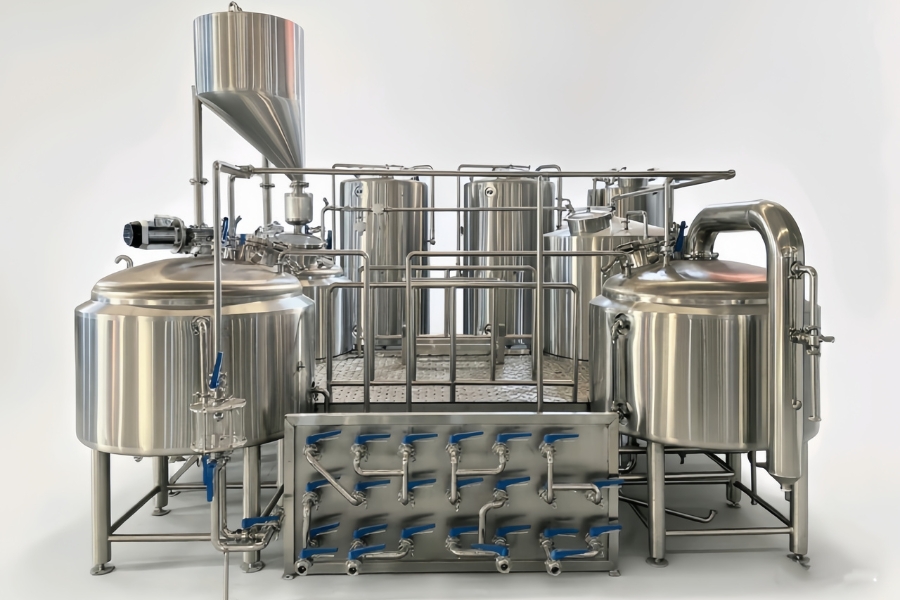
3-vessel (mash/lauter + kettle + whirlpool): Great if you’re brewing 2+ batches a day or have a busy taproom. You can lauter one batch while boiling another, cutting down brew day time.
4-vessel: Only get this if you’re planning 3+ batches a day. They let you run even more parallel steps, but they’re more expensive and need more space. Don’t overbuy—you can upgrade later!
Heating Method: Steam, Electric, or Direct Fire?
Steam: My favorite for consistency. It’s even, great for step mashing (changing temps during mashing), and gentle on wort. But it needs a boiler, venting, and regular inspections—factor that into your budget.
Electric: Clean and simple. Works best if your area has cheap electricity and enough power (you’ll need a 3-phase connection for larger systems). No venting needed—perfect for urban breweries.
Direct Fire: Cheap to run if you have easy access to gas, but watch for hot spots (they can burn wort, leading to off-flavors). You’ll need good ventilation—so no tight spaces.
Materials & Finish: Stainless Steel Matters
SS304 vs. SS316L: SS304 is standard—durable, easy to clean, and affordable. SS316L is more corrosion-resistant (great for sours or coastal areas with salty air), but it’s pricier. Only splurge on 316L if you need it.
Internal Polish: Aim for Ra ≤ 0.6 μm on all surfaces that touch wort. A smooth finish means bacteria can’t stick—and cleaning is faster. I’ve seen breweries skip this, only to fight infections later.
Welds & Hygiene: Full-penetration sanitary welds, passivation (a chemical treatment to protect steel), and no dead legs. Ask to see photos of the welds before you buy—this is where quality lives.
Automation Level: Manual vs. PLC
Manual: If you’re a small team (1-2 people), manual controls (sight glasses, analog gauges) work fine. They’re cheaper, and you’ll learn the process inside out.
Semi-Automated/PLC: If you want consistency (e.g., hitting the same mash temp every time) or have a bigger team, a PLC with a touchscreen is worth it. We tailor the HMI (human-machine interface) to your process—no confusing menus, just what you need (like mash step timers or pump interlocks).
Cooling & Glycol Loop: Size for the Worst Case
I can’t stress this enough: size your chiller for summer. If you’re in Texas or Florida, that means cooling a batch of wort while keeping 3 fermentation tanks at 68°F (20°C) and cold-crashing a lager. Insulate your glycol lines (use closed-cell foam—no cheap stuff!) and add bypass valves for maintenance (so you can fix a line without shutting down the whole system).

A Simple Checklist: If I Were Opening a Microbrewery Today
Here’s what I’d ask myself before buying a single piece of equipment—based on years of fixing “oops, I forgot that” moments.
Space & Layout
Minimum 80 square meters (about 860 sq ft) for a functional microbrewery—but more is better for cellaring (storing tanks) and packaging.
Follow the flow: malt in → hot side (brewhouse) → cold side (fermentation) → packaging. Keep wet/dirty areas (e.g., spent grain, CIP) away from dry/clean areas (e.g., grain storage, packaging).
Don’t forget: floor drains every 10-15 feet, hose bibs (for cleaning), steam vent paths (away from electrical), and space for a forklift or hand truck (to move kegs/tanks).
Utilities
Confirm power (phase, amps) with your electrician before ordering equipment. I’ve seen breweries get a 50-amp brewhouse only to find their building only has 30 amps.
Check water pressure and quality (hard water can mess with mashing—you may need a softener).
For steam: Confirm local venting codes and boiler inspection requirements.
Brewhouse Decisions
Vessel count: Match it to how many batches you’ll brew weekly, not just daily. If you plan to grow in 6 months, size for that growth.
Knockout time: How fast do you want to chill wort? A bigger heat exchanger means faster knockout (saves time).
Cellar & Expansion
Start with more fermentation capacity than you think. Your FV volume = your revenue—if you run out of tank space, you can’t brew more beer.
Leave headspace for an extra brite tank or horizontal tanks (they save space) later.
Packaging Plan
Decide early: Taproom-only (kegs) or distribution (cans/bottles)? If distribution is in your future, plan a small canning line now—even a manual one.
CO₂ storage: Keep tanks outside or in a well-ventilated room (CO₂ is heavier than air and can pool).
CIP & Safety
Dedicated CIP system (even a small cart) = less time cleaning, more time brewing.
Store CIP chemicals (caustic, acid) in a locked cabinet, away from food or beer.
Add safety gear: eyewash stations (for chemical splashes), PPE (gloves, goggles), and PRVs on all pressure vessels (kettles, boilers).

Common Pitfalls I See (And How to Avoid Them)
I’ve watched too many brewers waste time and money on these mistakes—here’s how to skip them.
Undersized glycol systems: “It’s fine for now” turns into “why can’t I cool my wort below 80°F (27°C) in July?” We calculate the total cooling load (knockout + fermentation + cold crash) and add a 20% safety margin—trust us, you’ll need it.
Poor wort aeration: Sluggish fermentations, off-flavors, or stuck ferments usually come from not enough oxygen in wort. Add an inline O₂ injector and a flow meter—simple, cheap, and game-changing.
Inadequate drainage/venting: Puddles on the floor lead to mold, and steam buildup leads to rust. We design drain slopes (1-2% grade) and steam vents into every layout—small details that prevent big problems.
Utility surprises: Imagine getting your brewhouse delivered, only to find your building doesn’t have enough power. We send you a detailed utility spec sheet before you order—so you can fix issues with your electrician or plumber ahead of time.
Overlooking spare parts: Keep extra pump seals, gaskets, PRVs, and temp probes on hand. Nothing shuts down a brew day like a broken gasket and no backup.
A Recent Project: How We Helped a Brewer Cut Their Brew Day From 7 Hours to 5
Let me walk you through a real example—this is how we work with brewers to solve their specific problems.
A team with a 10 hl (1000L) microbrewery came to us frustrated: their old 2-vessel system took 7 hours per batch, they were running out of tank space, and their flagship lager was inconsistent (too many temperature swings). Their constraints: limited power (only 3-phase 100 amps) and a tight floor space (about 90 sq meters).
What We Delivered
Compact 3-vessel brewhouse: We designed a mash/lauter, kettle, and whirlpool that fit their space—no wasted room. Steam heating (with a small, efficient boiler) gave them the temperature control they needed for their lager.
Oversized plate heat exchanger: Sized for summer knockouts—they now chill wort from boiling to 10-12°C (50-54°F) in one pass, no waiting.
Three new unitanks + one brite tank: The unitanks have glycol zoning (so they can control top and bottom temps separately—perfect for lagers) and full CIP coverage. The brite tank lets them carbonate while fermenting another batch.
PLC controls with a simple HMI: We programmed it to handle mash steps automatically (so they don’t have to stand by the tank adjusting temps) and added pump interlocks (to prevent human error, like turning on a pump without opening a valve).
The Results
Brew day went from 7 hours to under 5—they now brew 2 batches a day instead of 1, doubling their output.
Their lager is consistent: same gravity, same flavor, every time.
We did a Factory Acceptance Test (FAT) at our shop (so they saw the system work before it shipped), then helped with on-site commissioning (even remote support when they had a question post-install) and trained their team on cleaning and safety.

How We Build Brewing Equipment at Cassman (Our Process, No Fluff)
We don’t sell “one-size-fits-all” systems—because no two breweries are the same. Here’s how we work:
Start with your process: We ask questions first—batch size, beer styles (lagers need more cooling than IPAs), daily brew count, utilities, and space. No hard sells, just listening.
Sanitary fabrication: All our equipment uses SS304 or SS316L (your choice),full-penetration sanitary welds, and internal polishing to Ra ≤ 0.6 μm on all product-contact surfaces. Every tank gets pressure and leak tests—we won’t ship something we wouldn’t use in our own brewery.
Tailored automation: Whether you want manual controls (for a small team learning the ropes) or a fully automated PLC (with data logging and phone alerts), we build it to your workflow. No confusing “one-size-fits-all” HMIs—we’ll even walk you through how to program it.
FAT, SAT, and commissioning: Before your equipment leaves Jinan, we do a Factory Acceptance Test (FAT)—you can join via video call to watch it run. Once it’s on-site, we do a Site Acceptance Test (SAT) to make sure everything fits and works with your utilities. Then we stay until you’re brewing your first batch—remote support included if you hit a snag later.
Lifecycle value: We don’t just sell you a system—we help it last. We balance upfront cost with long-term savings: energy-efficient boilers, easy-to-service pumps, and parts that are easy to replace. And if you need to expand (add a tank, upgrade to 4 vessels), we design systems that grow with you—no need to start over.
Support you can reach: Let’s be real—equipment breaks, and you need help fast. Our team is available 24/7 for urgent issues, and we keep common spare parts in stock (so you don’t wait weeks for a pump seal). We speak English, too—no language barriers when you’re stressed about a brew day.
Quick Definitions for New Brewery Founders (No Jargon, Promise)
If you’re new to this, terms like “CIP” or “unitank” can feel overwhelming. Here’s what you need to know:
Brewhouse: The “hot side” where you make wort—includes mash/lauter, kettle, and whirlpool.
Fermentation tank (FV/unitank): A jacketed stainless steel tank where yeast turns wort into beer. “Unitank” means you can ferment and condition in the same tank (saves space).
Brite tank: For clarifying and carbonating beer—this is where beer gets “bright” (clear) before packaging.
CIP system: “Clean-in-place”—a system that circulates chemicals to clean tanks and lines, so you don’t have to climb in and scrub.
Glycol chiller: A machine that cools glycol (a non-freezing fluid) to control temperatures in fermentation tanks and chill wort.
SS304/SS316L: Types of stainless steel—304 is standard, 316L is more corrosion-resistant (for sours or salty areas).
Where to Go From Here (Let’s Build Your Brewery)
If you’re scoping a microbrewery—whether it’s a 5 hl pilot system for test batches, a 10 hl taproom setup, or a 20 hl line with canning—here’s how to start:
Grab a pen (or notes app): Jot down your target capacity (how much beer do you want to brew per batch?), preferred heating method (steam/electric/direct fire), and a rough floor plan (even a sketch works).
Send it to us: Head to www.cassmanmachine.com or drop us an email—we’ll review your details for free.
We’ll follow up: I’ll personally send you a technical review (no sales jargon—just what will work for your space and budget) and a tailored proposal. If you have questions, we can hop on a call to walk through it.
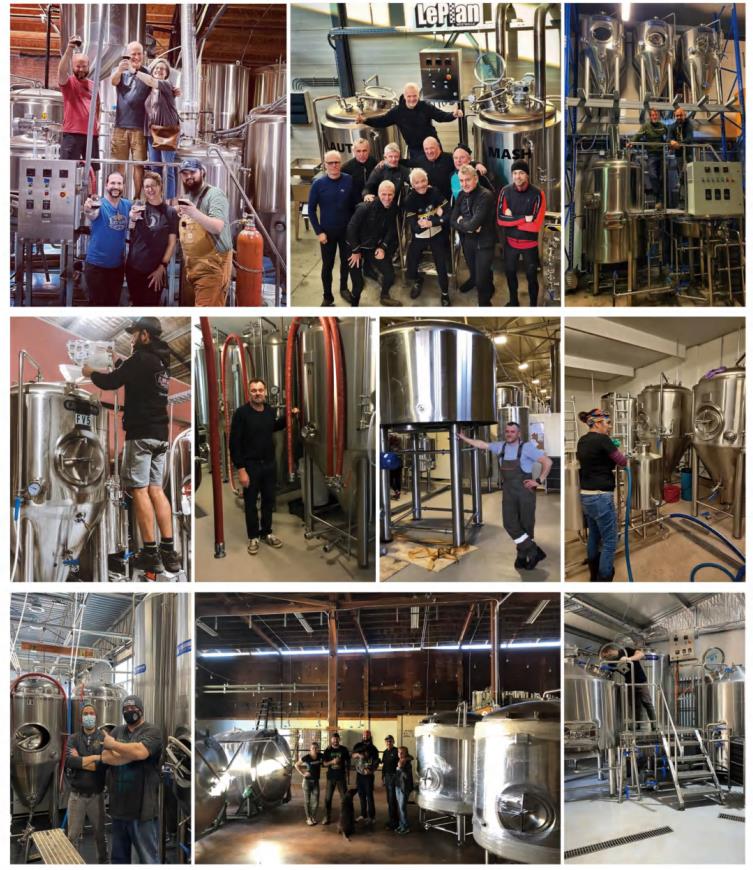
I’ve built systems for brewers in 20+ countries—from small taprooms in the U.S. to growing microbreweries in Europe and Asia. The best part? Watching your first batch pour clean, consistent, and exactly how you imagined it.
Let’s make your brewery dream a reality.
— Henry Chen, CEO
Jinan Cassman Machinery Co., Ltd.
www.cassmanmachine.com
Email: inquiry@cassmanbrew.com (I reply personally—no automated bots!)


